Root: The Root user is able to perform all actions in the account, including managing billing, managing other users.
Admin: Admin users are able to perform most Root actions, but can only view billing invoices and other users’ account details.
Developer: Developer users are able to perform all pipeline management actions but are unable to view details about billing or other users.
Viewer: Viewer users have read-only access to the pipelining and datastore features and access to hosted services (e.g., Superset and JupyterHub).
Guest: Guest users only have access to hosted services.
Managing your account
Account management settings are available on the “My Account” page (accessible via the Account option in the top-right settings icon), and provide options for changing an account’s name, password, and two-factor authentication settings.
Two-Factor authentication
To enable two-factor authentication, click the toggle when editing your account preferences. This will display a QR code that can be scanned using most time-based one-time password (TOTP) apps like Google Authenticator or Duo Mobile. Once scanned, you will be requested to enter the resulting 6-digit code from the app to verify that the two-factor authentication has been set up correctly. If two-factor authentication is already enabled, you can disable it by simply toggling again.
Managing Company Settings
Accounts with Root or Admin permissions will also have options to change Company Settings.
Okta SSO
To log in using Okta, follow the steps below:
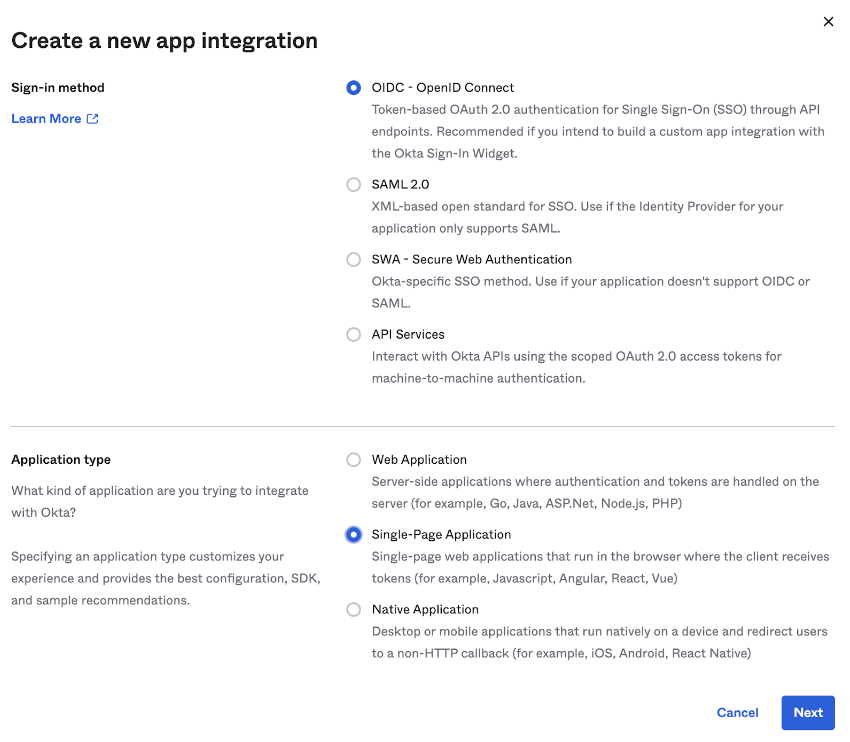
First, from the Okta developer portal, create a new integration. This option can be found under Applications > Applications in the left menu bar. Configure this integration to use OIDC and a single-page application as seen below.
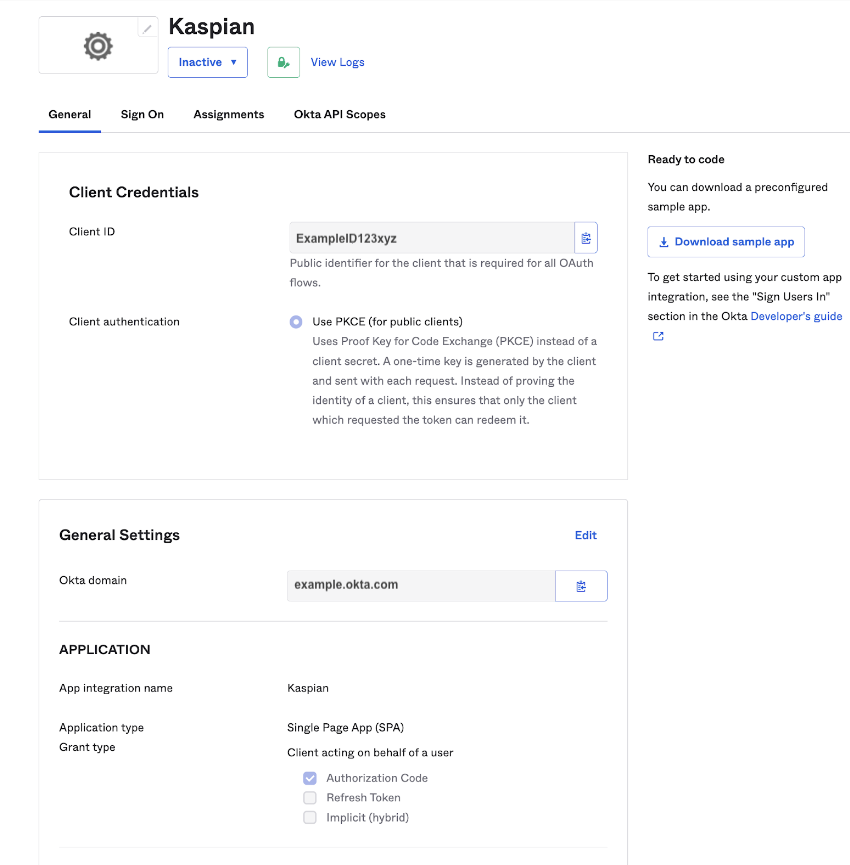
This will then open up a configuration panel. Fill out the details as shown below and save the app integration.
Open the details page for the new application, which will now be listed under Applications > Applications. Note the “Client ID” and “Okta Domain” fields.
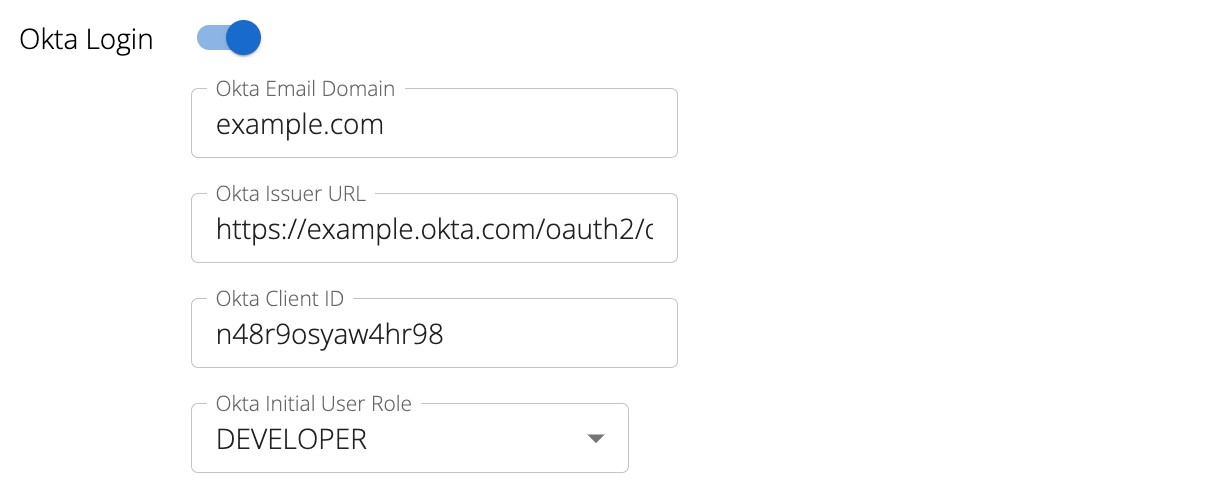
Navigate back to the Kaspian “My Account” page and turn on the “Okta Login” toggle, which will expose the form shown below:Fill out the details as described below:
Okta Email Domain: Company email domain associated with Okta, e.g., example.com
Okta Issuer URL: “Okta Domain” from Step (3) with the https:// prefix and the /oauth2/default suffix, e.g., for an “Okta Domain” of example.okta.com, enter https://example.okta.com/oauth2/default
Okta Client ID: “Client ID” from Step (3), e.g., ExampleID123xyz
Okta Initial User Role: Initial user role of users signing in via Okta for the first time, e.g., Developer
Google SSO
To enable login via Google, from an admin (or root) account, turn on the “Google Login” toggle on the Kaspian “My Account” page, which will expose the form shown below:
This form mainly concerns auto-registration; existing Kaspian users with Google (or Google-hosted) emails linked to their accounts will be able to login as long as the “Google Login” toggle is on. Auto-registration covers the case when a user attempts to login using a Google account not currently tied to a Kaspian account, and has the following options:
Google User Auto-Registration (toggle): Turn auto-registration on/off. If on, users logging in via Google with the requisite auto-registration domain (described below) will be automatically logged into Kaspian and registered as Kaspian users.
Google Auto-Registration Domain: Company email domain to allow users to auto-register with
Google Auto-Registration Role:Account permissions assigned to users created via auto-registration.
Managing other accounts
Root and Admin accounts can add new users on the “My Account” page. Root accounts can add all other types of non-Root users, but Admin accounts can only add users with Developer privileges(or below). Clicking the Add button reveals the following form:
\
Each user is assigned a Role and a Login Type. Roles are described in the Account Permissions section above.
Login types include native username/password login, Okta SSO, and Google SSO.
After specifying the requested information and submitting the form, the new user will be sent an email with their login credentials, and will be asked to change their password upon logging in.
The Root account is also able to reset the password for any given account on the “My Account” by clicking “Reset Password” for the user requiring the reset. The user requiring the reset will then receive an email with a link to a “Reset Password” page for their account.


 \
\